


Introduction
Power Virtual Agents helps us create intelligent conversational chatbots without any code implementation. With these bots, we can engage with customers and employees in multiple languages across websites, mobile apps, Facebook, Microsoft Teams, or any channel supported by the Azure Bot Framework
In this article, we will see how to create a basic bot that fetches the ticket status details from the back-end SharePoint List.
Business Use Case
As an end-user or as an issue resolver, getting to know the open and closed tickets is a common requirement. Rather than contacting the person servicing it or without searching for the ticket details in the specific backend, having a Power Virtual agent that answers your ticket-related query is a productivity booster.
Let’s try to create a bot that will listen to user questions related to Issues logged as tickets and respond back with details.
Implementation
To implement the Automated Enquiry system, we will use Power Virtual Agents where we can create a bot to attend to the queries and give automated responses based on the information we have in the system. To start with we will head over to https://web.powerva.microsoft.com/ and click on the Bot symbol on the top right corner which lets you create a new bot

Specify the name and language for use in the bot as well as the environment where it should be provisioned. It will create a basic bot where we can add the customizations needed for our requirements. Once the bot has been provisioned, We can see the section Topics which by default lists multiple conversation topics listed out. A topic defines how a bot conversation will be initiated and how the bot would respond to user interactions. Click on New Topic and Select From blank to create a Topic. We will name the topic as Get Ticket Status.

To trigger the topic, so that the control flows to that specific topic, we will define a few words called Trigger Phrases that will transfer the control to these topics. The trigger phrases can be single keywords or a group of words and to cover a broad spectrum of possible trigger conditions, It is good to mention 5-10 different and still related phrases. Click on Trigger phrases that will open a right pane where we can add the trigger words.

Let’s add a message box with the welcome message and add the node add a question to ask for more details from the user related to which tickets he would like to view and give the options Open and Closed. The response will be stored in the variable varTicketStatus

Based on the value chosen by the user, PVA will automatically generate 2 branches for both Open and Closed ticket status. We will further add another question node in both the branches to understand whether we need to fetch High/Normal Priority tickets. The value of the selection will be stored in varOpenPriority and varClosedPriority variables in respective branches.

Based on the value of the varOpenPriorty and varClosedPriority variables, PVA will create 4 branches. In each of these branches, we will add the call an action node and select the “Create a flow” option to create the Power Automate in the new window to which we will pass the ticket status and the ticket priority values. Once the Power automate is created, we will again add the call an action node to select the recently created Power Automate in each of the branches as below.

Finally, we will get back the return value from Power Automate in the respective output variables in each branch and show that in a message box and end the conversation with a survey. If we intend to add more logic, we can extend the conversation with more question actions.

Setting up the flow
When we click on Call an action, it will list the create a flow action clicking on which the Power Automate will open in the new window.

We will add 2 text inputs to hold the values of ticket status and ticket priority passed from PVA

Let’s initialize a variable – varTicketDetailsTable to hold the ticket details. Followed by that, we will add the get items action which will pick the items that match the ticket status and ticket priority mentioned in the filter query

Followed by this, we will add an apply to each action which will loop through the returned items. As PVA does not support HTML tables, we will use markdown language to create a bulleted list of items to show in the chat window. To create an unordered list, add dashes (-), asterisks (*), or plus signs (+) in front of line items. Indent one or more items to create a nested list. In this sample we will be using the below markdown syntax :
| – First item – Second item – Third item – Indented item – Indented item – Fourth item |
Which will generate the output as :
- First item
- Second item
- Third item
- Indented item
- Indented item
- Fourth item
So, in the value box, we will add the hyphen markdown followed by the column name and the corresponding value.

Let’s return back the variable to the Power Virtual Agents.

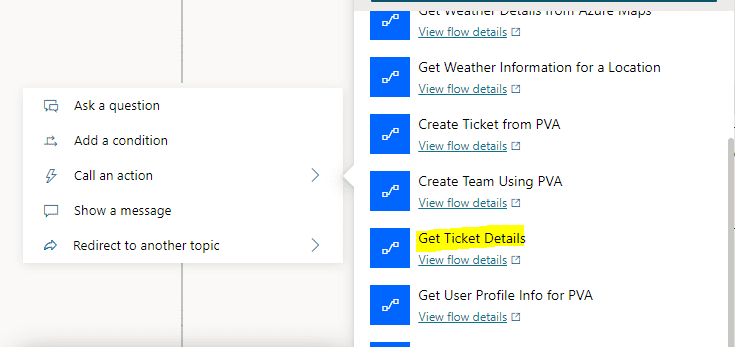
In the Power Virtual Agents, we can call this flow by clicking on call an action and selecting the Power Automate by the name.
Pass the values into the corresponding variables declared in the Power Automate

Test the bot
Let’s test the bot by adding a trigger word – Ticket Status. Thus it has invoked the PVA and used both the inputs entered by the user to pick the corresponding ticket details from the back end.

Summary
Thus we saw how we can use Power Virtual Agents to automate the inquiry to a ticket system to get details about the Open/Closed, Normal/High Priority tickets without the involvement of an intermediary resource.
